Easy Homemade Corn Relish
Homemade Corn Relish with an Electric Pressure Cooker
Making a family recipe for corn relish from an abundance of corn from your garden or from a local farmers market is traditional in our home. Making corn relish is a way to preserve the freshness of the summer harvest to be enjoyed for months to come.

Whether you can your corn relish, just refrigerate it for use in the next few weeks, or freeze it, you will not regret having tried one of our family’s favorite fall condiments. You can use corn relish on tacos, a side with burgers hotdogs, and roasted chicken. For any food, you would use a pickle relish you can substitute a sweet corn relish.
When making Corn Relish or any corn dish, I have found that using my pressure cooker/Instant Pot is the best option. Using the pressure cooker cuts the work in half & makes preserving fresh vegetables quick and easy, cooking 4 minutes under pressure. I have tried every way possible to remove corn from the cob I have found the Corn Zipper the best ever even better than a paring knife.
Find all my top 5 canning recipes here: 5 Basic Garden Canning Recipes.

This post contains some affiliate links for your convenience (which means if you make a purchase after clicking a link, I will earn a small commission, which helps keep my blog up and running, but it won’t cost you a penny more)! Click here to read my full disclosure policy.
Passing Down the Family Tradition of Canning
My Aunt Lois, my mother’s sister, was always a big influence in my life regarding homemaking, crafts, and cooking. When I was young, our family would travel to Ashtabul, Ohio, to visit my Aunt and Grandmother every Sunday for Sunday dinner and afternoon visits. Lois always had something going on; whether it was her fabulous expansive vegetable garden she tended, or the cooking and canning that were the harvest activities.
In the winter, when the gardens were cleaned up and the vegetables put up, then her time was spent on crafts. When we would visit, Aunt Lois always had a fun seasonal craft for the kids. My love for crafting started during these visits andhas stayed with me all my life.
Lois was a special needs teacher in Ashtabula, Ohio, long before the word special needs ever was used. Using Crafts and cooking was a way to educate and expand the minds of her disabled children. When my sister and I would visit her, teaching continued for us as she taught us fun crafts and cooking. She could make any craft activity in simple steps, so we could make the most beautiful DIY projects.
I remember one special project when my best friend Linda visited Aunt Lois, and we made pillows in the shape of frogs. Aunt Lois took us to pick out our own fabric and stuffing, and we learned to make a pattern out of brown paper bags. We cut our fabric, sewed the frogs, and stuffed them into pillows on our summer trip.
Fresh Food From the Garden
At the dinner meals, Aunt Lois always had fresh garden canned goods as side dishes. My favorite was watermelon rind pickles; however, I’ve never been able to master that recipe. One of my other favorites that Aunt Lois served at many a fall meal was her corn relish. I always loved corn relish, but I have never been satisfied with any that was store-bought.
Jim’s uncle, being a vegetable farmer and corn being one of their biggest crops, I decided last year I was going to give corn relish a try. I looked through a lot of the old recipes that I had written down when I visited Aunt Lois, and I found her corn relish recipe. I was so happy to find a recipe that had some family history and was an old favorite of mine from childhood.

Preparing for Canning
If you love fresh corn, you will love vintage corn relish as it brings the taste of fresh corn to your table in the fall and winter months.
- I start making a batch of corn relish by putting the husked ears of corn in the Instant Pot with about 3/4 cups of water and setting it for 4 minutes.
- While the corn was cooking, I chopped the other ingredients that needed to go into the relish.
- As the glass mason jars need to be sterilized, I put them in the dishwasher, as this takes some time.
- As you know, all processed canned goods need to have a water bath, so I start a huge canning pot full of water to boil on the stove.
- Next, I mix all the chopped ingredients together and set aside.
- I remove the corn kernels from the cob just using a Corn Zipper. (I’ve tried many of the other gadgets, and none of them seem to work as well)
- When the corn kernels are off the cob, I mix them with the additional ingredients.
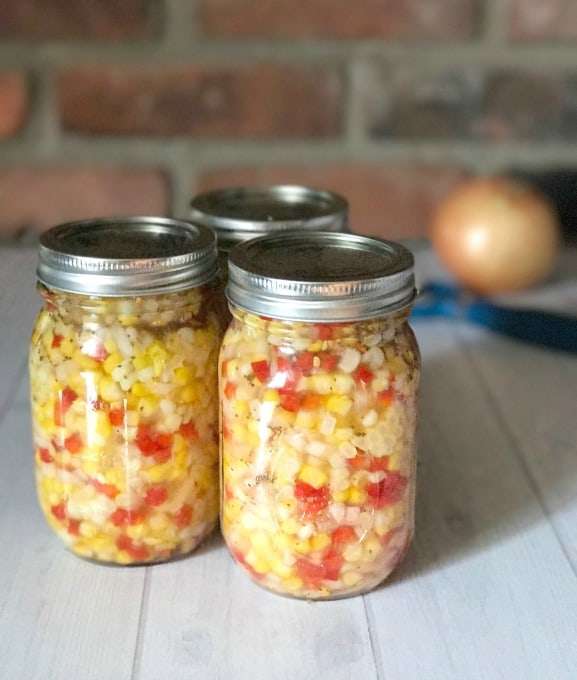
- At this point, I fill the sterilized mason ja,r leaving an inch of room at the top.
- Now the lids and the rims are placed in a pot of boiling water for five minutes in order to remove all germs.
- Make sure the top rim and edge of the canning jar are wiped clean and sealed with the lid and rim.
- Water bath for 30 minutes.
Supplies Needed:
- Ball Canning Jars
- Instant Pot
- Large Canning pot ( here is an entire set of what you will need)
- Lids & Rims for your Jars
- Corn Zipper
Freezing Fresh Corn
At the same time that I make my Aunt’s corn relish, I also freeze a bumper crop of corn in our freezer for our children. Our kids love Uncle Dick’s corn and especially our youngest son, Joey. I always purchase an entire crate of corn from Uncle Dick’s farm, Red Wagon Farm, and process corn to be frozen. Again, I cook the ears of corn in the pressure cooker for six minutes. When the corn is done, I let it cool and remove the kernels from the cob. I put the cooked kernels into Sandwich Ziplock freezer bags and put in the freezer at least a dozen ears of corn.
Print
Easy Home-Made Corn Relish
Pickled Corn Relish
- Total Time: 60
- Yield: 32 1x
Ingredients
- 8 Ears of Corn
- 1 cup of water
- 1/2 small Head of Cabbage chopped fine
- 1 med. Onion chopped
- 2 Green Peppers chopped
- 1 Red Pepper chopped
- 2 cups White Vinegar
- 2 cups Brown Sugar
- 1 tablespoon Salt
- 1 tablespoon Mustard Seeds
- 1 tablespoon Celery Seeds
- 1 Tsp Turmeric
Instructions
- I start making a batch of corn relish by putting the husked ears of corn in the Instant Pot with about 1 cup of water and setting it for 4 minutes.
- While the corn was cooking in the pressure cooker I chopped the other ingredients that needed to go into the relish. As you know all processed canned goods need to have a water bath so I start a huge canning pot full of water to boil on the stove.
- Next, I mix all the ingredients together and set aside. I remove the corn kernels off the cob just using a sharp kitchen knife. I’ve tried many of the other gadgets and none of them seem to work as well as just using a straight knife and taking my time.
- When the corn kernels are off the cob I mix them with the additional ingredients and fill the sterilized mason jar leaving an inch of room at the top.
- I sterilize my glass jars in the dishwasher on the sterilize setting, however, the lids and the rims I do boil in a pot of boiling water for five minutes. Make sure the top rim and edge of the canning jar are wiped clean and sealed with the lid and rim. Water bath for 30 minutes.
Notes
- I have modified my Aunts recipe for my family taste.
- Prep Time: 30
- Cook Time: 30 minutes
- Category: Side Dish
- Method: Canning
- Cuisine: American
Nutrition
- Serving Size: 2 tablespoon
- Calories: 26
- Sugar: 4.5 g
- Sodium: 66.5 mg
- Fat: 0.2 g
- Carbohydrates: 6.1 g
- Fiber: 0.4 g
- Protein: 0.5 g
- Cholesterol: 0 mg

Update as of 8-18-2016: I have two versions of corn relish; the above post is my Aunt Lois’s family version. We also made a second batch from BettyCrocker.com and we like this version better. So give both a try and see which one you like.
Print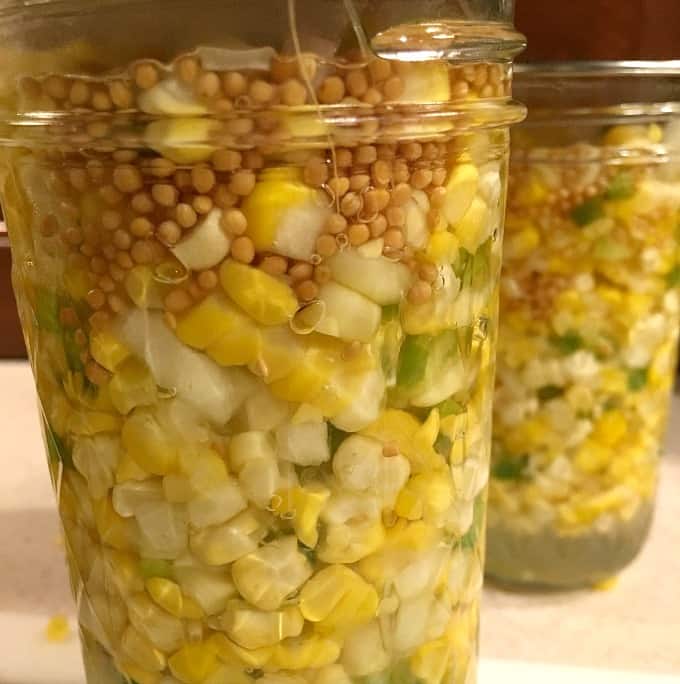
Corn Relish
I have change it up a bit
- Total Time: 1 hour
- Yield: 6–7 Jars 1x
Ingredients
- 6 ears of fresh corn on the cob cooked 4 minutes in the Instant Pot
- 1 cup of Water
- 2 Green Peppers chopped
- 1 med. Onion chopped
- 1 cup sugar
- 1 cup White Vinegar
- 1 teaspoon Celery Seed
- 1/2 teaspoon salt
- 1/2 teaspoon mustard seed
Instructions
- Wash 6 small canning jars in the dishwasher. Boil 6 lids and rims for 5 minutes in water.
- Put 1 cup of water in the inner pot of the Instant Pot and cook on high pressure for 4 minutes, fast release.
- Take the corn off the cobs after it has cooled with a corn zipper.
- mix the corn, pepper, and onion in the bowl.
- Heat in a saucepan the sugar, vinegar, celery seed salt and mustard seed to dissolve.
- Fill jars with corn mixture, then pour the vinegar to 1/2 inch of the top of the jar.
- Water bath jars 30 minutes. Make sure the tops pop in to ensure the vacuum.
- Prep Time: 30
- Cook Time: 30
- Category: Side Dish
- Method: Canning
- Cuisine: American
Nutrition
- Serving Size: 6
If you like this post on canning, you may want to read:
Refrigerator Dill Pickle Recipe
Piccalillli Canning Green Tomato Relish


I haven’t had corn relish but now I’m very excited about your recipe! It’s looking nice and inviting.
I haven’t have corn relish but now I’m very excited about your recipe! Thanks for bringing your dish to Fiesta Friday!
Mollie
Looks delicious! I don’t have a big enough yard to grow corn, but luckily the orchard up the street has really sweet corn in season right now! Thank you for sharing!
What a great recipe – and it looks so good! I’d be honored if you shared it at our What’s for Dinner party – http://www.lazygastronome.com/whats-for-dinner-sunday-link-up-162/
If you use frozen or canned corn for the corn relish, how much would you use? What is the time span that you can keep this corn relish?
Hi: I have never made this with frozen or canned, but I am thinking that frozen would be best, defrosted. If the jars are sealed and water bathed for 30 minutes they last up to 3 years. However, you have to examine each jar before you open them. It usually takes a can opener, what we call a church key, or beer bottle opener to get the lid off after you unscrew the rim. The lid has to be depressed and not pop up when pressed before you take the rim off. When you use the bottle opener to pry off the lid it should hear a soft pop, that means that the vacuum is still good and the food is still good.
I am so glad you asked this question as I know a lot of people have not grown up with canning. Let me know how yours comes out if you use frozen corn.
Have you ever used the bundt pan to cut corn off the cob?? Stick one end in the hole and slice straight down! All the corn is contained!! Not my idea but I’ve done it several times!! Nice and sturdy!
Cool idea thanks!
Yum, Susan! This looks delicious — too bad I didn’t see this when my dad’s corn was coming in by the bushel! Thanks for sharing with #HomeMattersParty!
I love this! I have been meaning to try my hand at canning! And thanks for linking up at Friday Frenzy Link Party! I hope you link up again next week 🙂 PINNED!
Your corn relish looks great Susan and I love the sound of your Aunt Lois garden 🙂
Mmmm…this looks so yummy! I love the idea of preserving summer corn for the winter when it’s not available locally. Thanks so much for sharing at the #happynowlinkup!
This sounds simply amazing!! 🙂
I would love for you to share this with my Facebook Group for recipes, crafts, tips, and tricks: https://www.facebook.com/groups/pluckyrecipescraftstips/
Thanks for joining Cooking and Crafting with J & J!
A beautiful way to save the harvest!! Thanks for sharing at the What’s for Dinner party! Hope you were able to check out some of the other awesome recipes there too!
This look so good! I’ve never had corn relish before.
My dad recently brought me a corn and red pepper salsa (no tomatoes) that had a sweet and sour tang going on. Is that similar to your relish? I have been looking for a recipe to remake that, and this looks similar!
Yes, this has a sweet and tangy taste, but very mild.
It’s late for good fresh corn. Could I use frozen?
Yes you can use frozen or canned. We had just gotten some fresh at a farm market. But this fall I am going to substitute frozen as my whole family lived it.