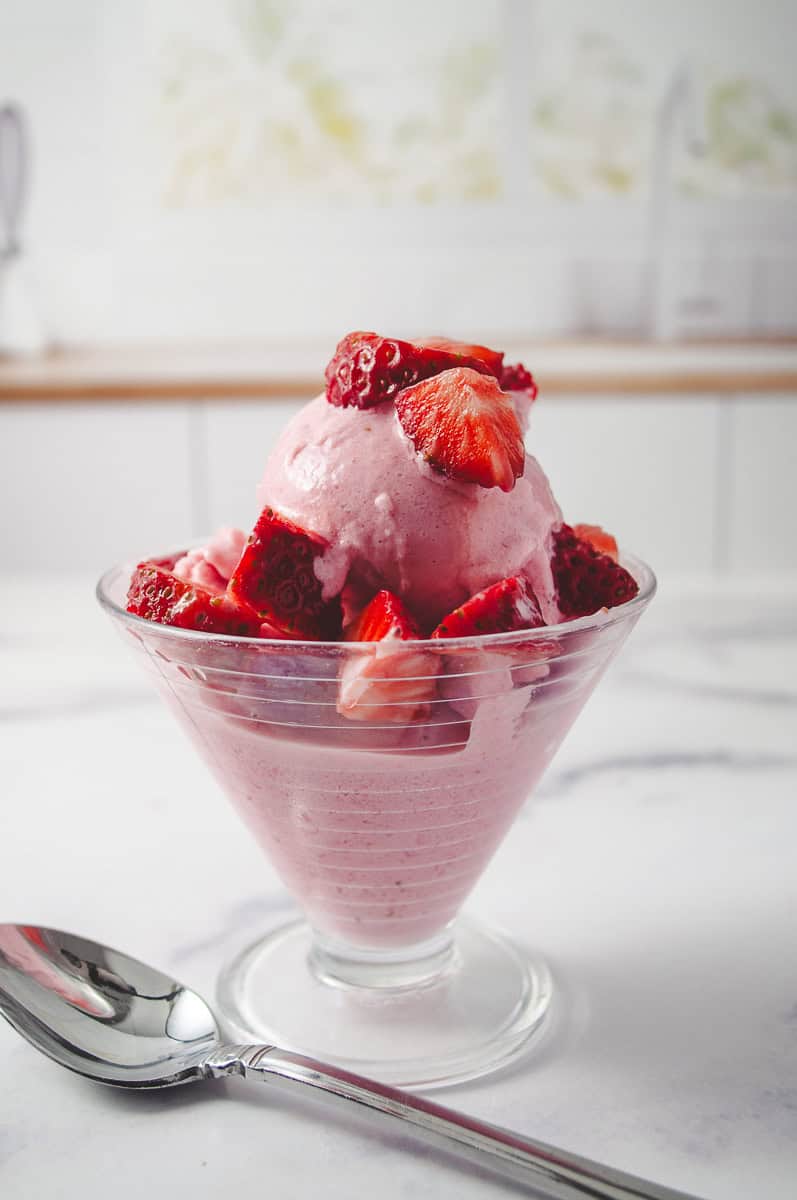
| | |

DIY Vinyl Valentines Placemat

Sharing is caring!

DIY Valentines Vinyl Placemat white placemat with valentines vinyl hearts, mug, heart cookies

Placemats are an easy and inexpensive way to decorate your tablescape for a bright colorful Valentine’s Day Party.  DIYing a vinyl Valentine Placement is a fun way to add your creativity and an easy way to get the kids involved. 

This post contains some affiliate links for your convenience (which means if you make a purchase after clicking a link I will earn a small commission which helps keep my blog up and running but it won’t cost you a penny more)! Click here to read my full disclosure policy.  

Using my Cricut Explore Air makes using adhesive vinyl easy to cut and use for decorating. Cricut has the Cricut Maker Machine that will not only cut vinyl but wood and fabric. You have so many options for design in the Cricut Design Space library. With the upload function, the images that you can use to design are unlimited. I can spend hours looking for beautiful images. I grab a lot of free images from The Hunger JPEG site.

DIY Valentines Vinyl Placemat white placemat with red valentines hearts and love

Valentine’s Day Tea Party Design Plan

I wanted a Valentine theme party placemats to coordinate with the DIY Vinyl Valentine Mugs I designed (Click for the post).  So I used a lot of the same cute images to decorate my placemats for my tablescape. Red and pink vinyl for the hearts and Valentine’s Day phrases.

DIY Valentines Vinyl Placemat White placemat with heart cookies a white mug with red hearts and be my valentine and love in red vinyl

I found my placemats at Home Goods in the clearance section. You can also find plain placemats as a lot of your big box stores. (while I love the weave of my placemat, I was not able to use iron-on vinyl.  The plain vinyl stuck to the placemat, but I would suggest a more flat material with a tight weave.)

DIY Valentines Vinyl Placemat White placemat red hearts and be my valentine and love in red vinyl

Making The Project With Cricut

Now that I have my images and my placements I can easily upload the images to Cricut Design space and play around to get the design I want. I placed a square on the blank canvas and then changed the color light gray. I then made the shape of about the size of the area on my placemat that I am going to decorate.

DIY Valentines Vinyl Placemat cricut design space
DIY Valentines Vinyl Placemat cricut design space red hearts and be my valentine and love in red vinyl

The next step to take is to upload the images I purchased at “The Hungry JPEG” to Cricut Design space.  I have an in-depth tutorial: “Print & Cut Label Tutorial in Cricut Design Space” on how to upload any image you own to use with your Cricut. See the Tutorial Here. 

Download The Project Images

If you have a Cricut or other cutting machine, you can download the images I used and upload them to your machine’s software. I have the beautiful images that I created in Design Space with my Cricut Explore Air to decorate my white placemats.

If you want to design your placemats with similar images, Click Here or on the image below, to be to sign up for the Printable Library. There you can download the images for your personal use. The images can be imported into design space and made into a cut image for any of the Cricut Machines.

DIY Valentines Vinyl Placemat red hearts and be my valentine and love in red vinyl

If you do not have a Cricut Machine, you can print the images on sticker paper and cut out by hand.  

Supplies Needed for the DIY Vinyl Valentines Placemat:

Steps To Create Your Valentine’s Day Placemat:

  1.  If needed, Iron the placemat to make sure it is flat.
  2. Download the Printable Images in the Printable Library. 
  3. Upload the images to your cutting machine software, or print on sticker paper.
  4. Cut the images on adhesive vinyl.
  5. Weed the vinyl that will not be used for your image.
  6. Place a piece of Transfert Tape over the weeded vinyl and rub with your fingers.
  7. Lift up the transfer tape so that the vinyl sticks to the transfer tape.
  8. Play around with the images sticky side up on your placemat to get the design you want.
  9. Now place the adhesive vinyl on to the place and rub with your fingers.
  10. Remove the transfer tape leaving the vinyl image on your placemat.

You will love using this method to decorate your table for all the holidays.  These same designs can be cut onto Heat Transfer Vinyl (Iron-on) and ironed on to a placemat for a more permanent designThe adhesive vinyl will just peel off if you want to make another design.

DIY Valentines Vinyl Placemat White placemat with heart cookies a white mug with red hearts and be my valentine and love in red vinyl

Have a wonderful Valentine’s day, and enjoy making the DIY decorations for your friends and family.

You May Also Be Interested In:

Valentines DIY Vinyl Coasters

10 Fun Valentines Party Ideas

DIY Vinyl Valentines Mug

Valentines Crafts for Kids Chocolate Heart Candies

Easy Valentine’s Day Pom Pom Wreath

VALENTINE’S DAY LOVE LETTER & ENVELOPE ART

Easy DIY Vinyl Valentine’s Day Craft Heart Party Plate

How To Cut Paper Hearts By Hand

Similar Posts

6 Comments

  1. What a fun use of the Cricut! Thanks for sharing with Party in Your PJs!

  2. Oh how I miss doing stuff like this. Not preparing for Valentine’s, but doing stuff like the DIY placemat. Such a sweet and cute idea. Thanks for sharing your talent at Fiesta Friday party. Have fun! x

Leave a Reply

Your email address will not be published. Required fields are marked *